Purpose
Provide a program that tests the communication of command messages to the U401⁄U421⁄U451. This application will transfer the “raw” command to⁄from the U4x1. The raw commands are typically used for OS support other than Windows. This Windows application shows how a raw command is used, similar things can be done for other operating systems. The raw commands are used for this type of programming, or for alternate OS programming. Since the USBm.dll encapsulates these commands and gives commands that are easier to read⁄understand, it is better to use the commands in USBm.dll.
Description
This is a debug application that will send a command to the U401⁄U421⁄U451 and display the response. The command is entered in the eight data boxes. When the “command” button is clicked, the message is sent to the U401⁄U421⁄U451, and displayed in the status box along with the response from the U401⁄U421⁄U451. App0 can also be used to display the U4x1 serial number and other device information.
Screen Shot
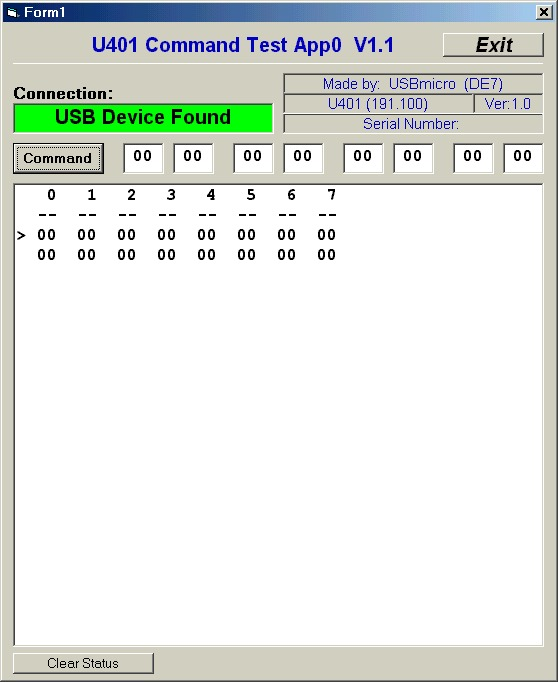
Below is a screen shot of this application after sending the command to initialize ports. The line with the “>” is the raw command sent to the U4x1, below that, the reply. The first byte, the command byte, is set to all 00h. The remaining bytes for this command are not used by the U4x1 and reflect the values in the entry boxes.
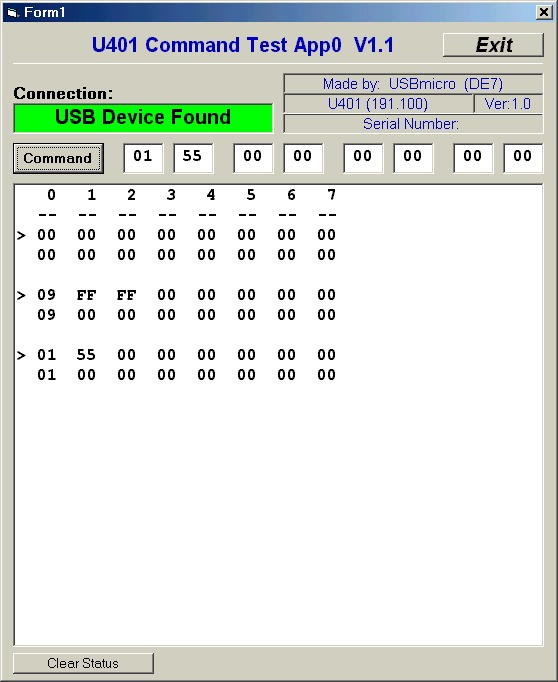
Below two additional raw commands have been sent to the U4x1. The “09” command sets the lines of port A to all outputs. The “01” command sends a byte value (55h) to port A.
Hardware
This application can send messages to an attached U4x1 for testing. No additional hardware is necessary for Application 0. Specific hardware for testing different commands depend on that command.
App0: VB Implementation with USBm.dll
VB Project
The VB project includes the file USBmAPI.bas. This file acts as the interface between the VB project code and the USBm.dll. Each function in the DLL has a corresponding declaration in this basic file so that the VB compiler can correctly match the called parameters. This application uses the USBm.dll interface but uses the DLL commands USBm_ReadDevice and USBm_WriteDevice to send the raw commands.
Discover Devices
| ‘ Discover device(s) USBm_FindDevices ‘ First U4xx device If USBm_DeviceValid(0) Then DeviceStatus.Caption = “USB Device Found” DeviceStatus.BackColor = &H1FF00 result = USBm_DeviceMfr(0, workstr) Manufact.Caption = “Made by: ” & Hex$(USBm_DeviceVID(0)) & “: ” & workstr result = USBm_DeviceProd(0, workstr) Device.Caption = Hex$(USBm_DevicePID(0)) + “: ” + workstr DevVersion.Caption = Hex$(USBm_DeviceDID(0)) result = USBm_DeviceSer(0, workstr) Serial.Caption = workstr Else DeviceStatus.Caption = “USB Device Not Found” DeviceStatus.BackColor = &H1FF End If |
USBm_FindDevices is called to have the DLL find the U4x1 devices attached to all USB buses. The devices are found and assigned to an internal table. The device table starts at 0, so the first U4x1 device found would be device 0. The second USB device would be device 1, and so on.
The sample application addresses a single U4x1 device, the first (0) device. If a valid device 0 is found, then get some general information from the device, such as the serial number.
Send a command to the U4x1
| ‘ Send a command to the device Private Sub Cmd_Click() ‘ Get bytes from input boxes OutBuffer(0) = ReturnHexByte(Byte0.Text) OutBuffer(1) = ReturnHexByte(Byte1.Text) OutBuffer(2) = ReturnHexByte(Byte2.Text) OutBuffer(3) = ReturnHexByte(Byte3.Text) OutBuffer(4) = ReturnHexByte(Byte4.Text) OutBuffer(5) = ReturnHexByte(Byte5.Text) OutBuffer(6) = ReturnHexByte(Byte6.Text) OutBuffer(7) = ReturnHexByte(Byte7.Text) ‘ Copy data to display box StatusBox.AddItem “> ” + _ TwoHexCharacters$(OutBuffer(0)) + ” ” + _ TwoHexCharacters$(OutBuffer(1)) + ” ” + _ TwoHexCharacters$(OutBuffer(2)) + ” ” + _ TwoHexCharacters$(OutBuffer(3)) + ” ” + _ TwoHexCharacters$(OutBuffer(4)) + ” ” + _ TwoHexCharacters$(OutBuffer(5)) + ” ” + _ TwoHexCharacters$(OutBuffer(6)) + ” ” + _ TwoHexCharacters$(OutBuffer(7)) ‘ Write command to device, and get reply Call WriteReadUSB ‘ Copy data to display box StatusBox.AddItem ” ” + _ TwoHexCharacters$(InBuffer(0)) + ” ” + _ TwoHexCharacters$(InBuffer(1)) + ” ” + _ TwoHexCharacters$(InBuffer(2)) + ” ” + _ TwoHexCharacters$(InBuffer(3)) + ” ” + _ TwoHexCharacters$(InBuffer(4)) + ” ” + _ TwoHexCharacters$(InBuffer(5)) + ” ” + _ TwoHexCharacters$(InBuffer(6)) + ” ” + _ TwoHexCharacters$(InBuffer(7)) StatusBox.AddItem ” ” End Sub ‘ USB Transfer Public Sub WriteReadUSB() USBm_WriteDevice 0, OutBuffer(0) USBm_ReadDevice 0, InBuffer(0) End Sub |
This code shows what is done when the command button is pressed. First, the bytes that are in the input boxes (take a look at the form) are copied to an array. Those command bytes are then copied to the display.
The call to WriteReadUSB is the communication with the U4x1 device. WriteReadUSB transfers the command to the USB device and gets the reply from the device. The device reply is then copied to the display.